
Table of Contents
- What Is Tongue and Groove Paneling?
- Step 1: Choose Your Style
- Step 2: Choose the Right Wood Type
- Step 3: Look for End-Matched Boards
- Step 4: Board Sizes, Thickness, and Coverage
- Step 5: Pre-Finished vs. Unfinished Wood
- Step 6: How to Match Your Budget
- Common Mistakes to Avoid
- Final Thoughts: Keep It Simple
- Ready to Start Your Tongue and Groove Ceiling?
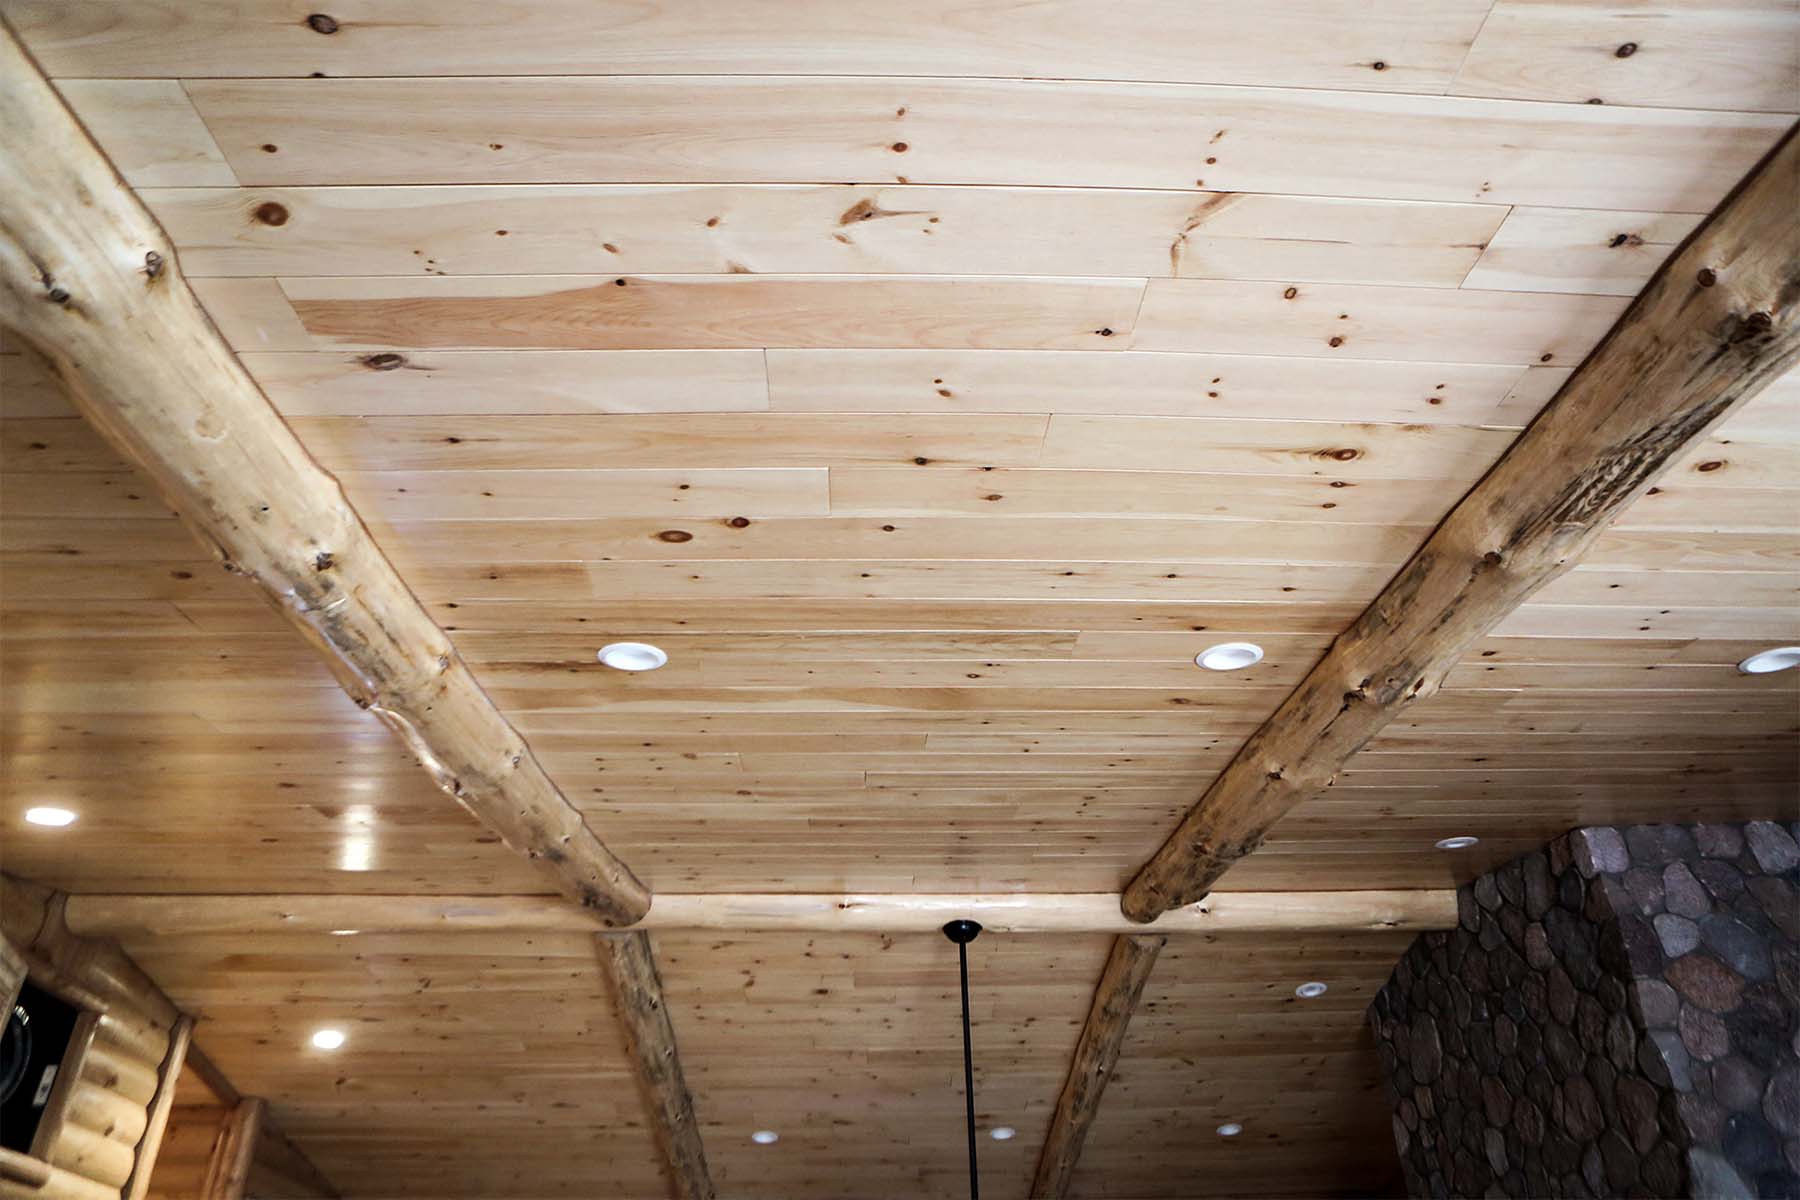
Thinking about installing a tongue and groove ceiling? It’s one of the simplest ways to completely change the feel of a room, whether you’re going for modern, rustic, or something in between.
But once you start looking at options, it can get confusing fast: different wood types, grades, finishes, and price points.
This guide walks you through everything simply so you can choose the right tongue and groove paneling without second-guessing your decision.
What Is Tongue and Groove Paneling?
Tongue and groove (T&G) paneling is made of boards that lock together along the edges, creating a smooth, continuous surface.
It’s commonly used for:
- Wood ceilings
- Interior walls
- Accent spaces
Why people love tongue and groove ceilings:
- Clean, finished look with no visible fasteners
- Durable and long-lasting
- Works in both modern and rustic homes
- Adds warmth and texture instantly

Cited from Woodcraft
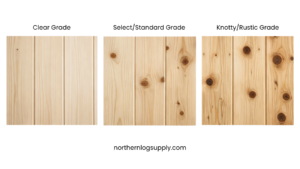
Step 1: Choose Your Style (Understanding Wood Grades)
When shopping for tongue and groove wood, “grade” simply describes how the wood looks, not how strong it is.
Clean Look (Clear Grade)
- Minimal knots
- Uniform color
- Best for modern or high-end interiors
Natural Look (Standard or Select Grade)
- Some knots and variation
- Balanced, warm appearance
- Works in most homes
Rustic Look (Knotty or Rustic Grade)
- Heavy knots and character
- Color variation and imperfections
- Ideal for cabins, basements, farmhouse styles
Step 2: Choose the Right Wood Type
The type of wood affects the color, durability, and price of your ceiling.
White Pine Tongue and Groove ($)
- Most popular and budget-friendly
- Light color, easy to stain
- Great all-around option
White Cedar Tongue and Groove ($$)
- Naturally resistant to moisture, rot, and insects
- Light, consistent color with subtle grain
- More stable than pine with less expansion and contraction
Beetle Kill Pine ($$)
- Blue/gray streaks for a unique look
- Same durability as standard pine
- Adds character and visual interest
Red Cedar Tongue and Groove ($$$)
- Naturally resistant to moisture and insects
- Rich color and strong grain
- More stable than pine

At Northern Log Supply, our pine and cedar are selected for consistent quality and precision milling, especially end-matching, so installation is smoother and more efficient.
Step 3: Look for End-Matched Boards (This Makes Installation Easier)
Not all tongue and groove paneling is milled the same way.
What is end-matching?
It means the boards connect on all four sides, not just the long edges.
Why it matters:
- Faster installation
- Cleaner seams
- Less material waste
Here’s the big benefit most people miss:
You don’t have to cut every board to land perfectly on a ceiling joist. That means you can reuse shorter pieces instead of throwing them away.
If you’re doing this yourself, end-matching is one of the best upgrades you can make.
Step 4: Board Sizes, Thickness, and Coverage
Most tongue and groove ceiling boards come in:
- Thickness: around 3/4 inch
- Widths: 1×6, 1×8, 1×12
- Lengths:
- Pine → up to ~12 feet
- Cedar → up to ~16 feet
Nominal vs. Actual Size (This Saves You Money)
This is one of the most common mistakes homeowners make.
When you see a “1×6,” that’s not the actual size.
- Nominal Size: 1 × 6
- Actual Size: 3/4 inch × 5 1/2 inches
- Visible Coverage: around 5 inches once installed (varies slightly by profile)
Why this matters:
You need to calculate how much material you need based on coverage, not the labeled size, or you’ll come up short.
What to keep in mind:
- Longer boards = fewer seams
- Thicker boards = more solid feel (but not required)
Step 5: Pre-Finished vs. Unfinished Wood
This decision comes down to time vs. cost.
Pre-Finished Tongue and Groove
- Already stained or sealed
- Consistent finish
- Much faster installation
Best choice for ceilings because of no staining overhead.
Unfinished Wood
- Lower upfront cost
- Fully customizable
- More labor-intensive
Best for DIYers who want full control
Step 6: How to Match Your Budget
Budget Option
- Knotty pine
- Unfinished
- Standard lengths
Mid-Range Option (Most Common)
- Standard grade pine
- Optional stain
- End-matched boards
Premium Option
- Cedar or clear-grade pine
- Pre-finished
- Longer boards for fewer seams
Common Mistakes to Avoid
If you want your tongue and groove ceiling to last, avoid these:
- Skipping acclimation
- Ignoring moisture levels
- Choosing grade based on “quality” instead of appearance
- Underestimating finishing time
Quick tip:
Let your wood sit in the room for 48–72 hours before installation so it can adjust to temperature and humidity. This helps prevent warping or gaps later.
Final Thoughts: Keep It Simple
When it comes to choosing the right tongue and groove paneling:
- Grade = how it looks
- Species = color and durability
- Milling = how easy it is to install
- Finish = time vs cost
Everything else is just branding.
Ready to Start Your Tongue and Groove Ceiling?
Choosing the right combination of wood species, grade, and finish can feel overwhelming, but you don’t have to figure it out on your own.
The team at Northern Log Supply is here to help you every step of the way, from selecting the right materials to planning out your ceiling layout.
Whether you have a quick question or need help designing your entire space, we’re happy to help.
Frequently Asked Questions
▼ What is the best wood for a tongue and groove ceiling?
The best wood depends on your priorities. Pine is the most popular because it’s affordable and easy to work with. Cedar is a better choice if you need moisture resistance or want a richer, more premium look.
▼ What grade of tongue and groove wood should I choose?
Wood grade is about appearance, not strength.
Clear grade = clean, modern look
Standard/select = balanced, natural appearance
Knotty/rustic = more character and texture
Choose based on the style you want your space to have.
▼ Is tongue and groove paneling hard to install?
It’s considered one of the more DIY-friendly ceiling options. The boards lock together, and end-matched boards make installation faster while helping reduce waste.
▼ What are end-matched boards and why do they matter?
End-matched boards connect on all four sides, not just the long edges. This makes installation easier, reduces waste, and helps create a cleaner finished look.
▼ Should I use pre-finished or unfinished tongue and groove?
Pre-finished boards save time and provide a consistent finish, which makes them especially popular for ceilings. Unfinished boards cost less upfront but require more labor.
▼ How much tongue and groove paneling do I need?
You should calculate based on coverage, not the labeled board size. For example, a 1×6 board only covers about 5 inches once installed. Always account for cuts and waste when estimating materials.
▼ Do I need to acclimate tongue and groove wood before installing?
Yes. Let the wood sit in the room for 48 to 72 hours before installation so it can adjust to temperature and humidity. This helps prevent gaps or warping later.
▼ What size boards are best for ceilings?
Common sizes are 1×6, 1×8, and 1×12.
Narrow boards add more texture, while wider boards create fewer seams and a cleaner look. Most homeowners choose 1×6 or 1×8 for ceilings.
▼ Does tongue and groove expand and contract?
Yes. All wood moves with humidity changes. That’s why acclimation and proper installation spacing are important to help prevent gaps or buckling.
▼ Is tongue and groove ceiling expensive?
It can range from budget-friendly to premium depending on the wood type, grade, and finish. Knotty pine is usually the most affordable option, while cedar or clear-grade wood costs more.