How to Drill and Install Log Posts for Railing
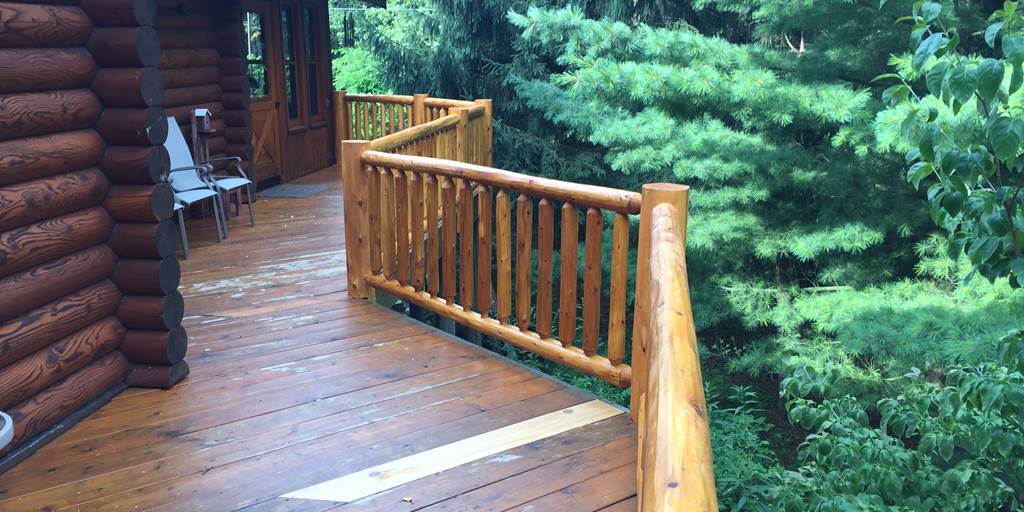
Cedar log railing can give your porch, deck, or staircase the rustic look and durability you desire for your log home or cabin. At Northern Log Supply, our railing is milled for easy installation and will arrive at your site ready to be installed. We can even help with the log railing installation if you’d like. For the DIY-type, installing railing posts yourself may be the better option.
In this blog, you’ll find tips on how to install railing posts. Here’s what you need to know before installing your log railing.
TOOLS AND MATERIALS: WHAT YOU’LL NEED For a DIY Log Railing
DIY log railing installation is simple as long as you follow the right steps. To drill and install your log railing posts, you’ll need to first gather the following and materials:
- Pencil
- Measuring tape
- Torpedo level
- Cross-saw or chainsaw
- Power drill
- 1/2 inch drill bit
- Chop saw
- 6” length, 3/8 lag bolt with a 9/16 head
- Washer
7 Steps for Installing Log Railing Posts
1. Measure the Post
First, locate what kind of post you need, such as an outside corner, inside corner, line post, or lap post. Take that post and measure the width to find and mark the center point.
Next, measure the length to determine and mark where you would like the tail to hang over. Typically, we use an 8” overhang. This mark will tell you how deep your lap will be hanging out. Make another mark on the other side at the same height.
Using a torpedo level, make a mark down the center of the post to ensure a straight line and cut. Then, transpose that mark up to the overhang mark that you previously made.
2. Make a Cut
There are two ways you can cut the post, depending on your personal preference. Some people prefer to use a cross-cut saw to cut the post, or, as in the video, you can use a chainsaw. Before cutting the post, ensure that it is secured using a trough stand or a sawhorse with a clamp.
3. Make a Notch
Once the cut is pushed all the way through, take it to a chop saw to cut the tail off the outside. This will be the start of your notch, where you will now cut through, down to where the center was taken out with the chainsaw (or cross-cut saw). When making this notch, ensure that your log is parallel to the table, so when it mounts onto your deck, it’s straight. Be sure to remove all debris from the notch, so when fastening, you get a tight, secure fit.
4. Measure for Tenon Ends
Now that you have notched the line, corner, or inside post, it’s time to measure where you will drill for the tenon ends on the railing section. Make your first mark at 5.25” from the bottom. Placing your measuring tape on the first mark, make your second mark at 30.74”.
At this point, look up from the center of your notch and transpose that mark to the two marks you just made. Use your torpedo level on the notch to ensure that these holes will be drilled in a straight line.
5. Drill Your Holes and End
Use a half drill bit to drill holes in the two marks made in step 4.
Once the two holes have been drilled for the railing, you’ll need to drill the end, so it can be fastened onto the deck. Turn the post 90 degrees—if using one fastener, your hole should be centrally located, or if using two fasteners, split the difference of the two.
Then, make your mark at 3.25” and drill a hole. Be careful not to drill completely through the wood, so your lag bit holds onto the edge of the post.
6. Fasten Posts to the Deck
Now, it’s time to fasten your post to the deck. You can use a standard 6” length, 3/8 lag bolt with a 9/16 head and a washer to fasten the post to the deck. Once the post is firmly lagged into place, repeat this step with the second post.
7. Fasten Tenons Into the Posts
Once the posts are fastened to the deck, you’ll need to fasten the tenons of the railing into the posts using the same application as the spindles are screwed to the rail. Top and bottom tenons are recommended to be screwed into both posts at the top and bottom of each.
Your log railing should now be successfully installed!
Cedar Log Railing from Northern Log Supply
Northern Log manufactures cedar log stair railing, deck railing, and spindles available in custom lengths and built to your specifications. Our standard pre-assembled log railing features:
- 4” top and bottom rails
- 8” x 48” posts
- 3” spindles, spaced 6.5” apart, so there isn’t too large of a gap in between the spindles.
Our cedar log railing is available in classic, traditional, and double top styles, as well as hickory spindle railing available. For a more rustic look, we also offer black bar railing and circle-sawn rebar railing.
If you have any questions, or would like to place an order, please don’t hesitate to contact us. Our friendly staff will be happy to assist you!
